Posted by Kala Cuneo on 1st Aug 2024
The Easy Secret to Good Pour Over Coffee
There are all kinds of ways to prepare coffee. Iced, hot, add cream, steamed milk, sugar, or any flavor of syrup you can dream of. Some even cool their coffee with liquid nitrogen! Everyone has their preferred method, and there are many to choose from when you prepare your favorite stomach friendly blend. A coffee connoisseur can tell you the merits of their preferred method, and it’s true that different methods cater to certain preferences - from bringing out a different flavor profile, to speed or ease of brewing. But today, we’re going to talk about what is perhaps the most forgiving method of brewing your coffee: the pour-over.
What do we mean by “forgiving”? Simply that the pour-over method has a high success rate in accomplishing a bold, delicious cup of hot (or iced!) coffee, even if the instructions we are about to list don’t get followed exactly - unlike, say, a French press that will reward delays with additional boldness and sometimes bitterness of taste.
What
will you need to create a great pour-over cup?
- hot water, ideally just shy of boiling (or boiled and then given 30 or so seconds to cool). This can be poured from a goose-neck kettle, a normal tea kettle, or a pot straight off the stove. The secret is to use something that allows you to control the pour rate!
- coffee, preferably a medium grind - not as fine as for espresso and not as course as for French press.
- a filter. Here’s where a variety of options will serve you just as well. More on that in a moment.
- Something to hold the filter and siphon the coffee into your mug or carafe.
- One last item that may assist, but not strictly necessary, is a timer?
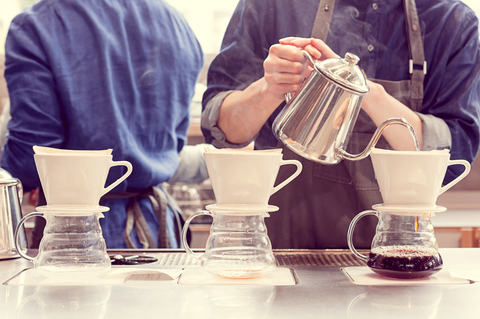
So how do we make a pour-over? Well, like many coffee brewing options, the method is right there in the name. When following the pour-over method you’ll be pouring the hot water through the grounds on its way to your mug or carafe.
There are many options for holding filters and directing the pour. Most options that set above your container are going to be cone shaped so that they direct the brewed coffee right into the center of the mug or carafe. Generally, a cone-shaped paper filter placed in a holder made for pour-over is the go-to for most. However, there are also beautiful carafes with molded cone tops available that easily hold the filter and smoothly drip the coffee straight into the container. Another option is a metal, cone-shaped filter that sits atop your mug. This option removes the need for a paper filter altogether. But, if you’re really in a pickle with no filters in sight, some claim that a cloth bandana made of a reasonably thin fabric will suffice.
However, the variations of filter thickness and the grind size will affect timing more than anything else, as a thicker filter will take longer for the coffee to pass through, as will finely ground beans. Coarsely ground beans will allow a faster flowrate and the water may not pick up the flavor you want.
Here’s the method:
1. Add roughly the same amount of coffee grinds to your filter as you would for a typical drip coffee maker.
2. Once the water’s hot enough (102-110º F.), start your timer if you’re using one, and pour just enough to get all the coffee grounds wet. While pouring water use a circular swirl motion but stay inside the edge where the grounds meet the filter. This optimizes the water dispersion throughout the grounds to increase the flavor transfer on its way to your cup. If you’re timing it, pour this amount in by the 30 second mark.
3. Wait about 30 seconds after that first pour (so until your timer says 1 minute if you’re using that). This is what coffee aficionados call letting the coffee “bloom,” which is just a fancy way of saying the hot water hitting the grounds makes them expand slightly, which opens them up to pass a bit more flavor to the rest of the water.
4. Maintaining that gradual, circular motion, pour in the rest of the water. If you’re using a timer, you’ll want to pace this so that half of the remaining water is in by the 1:30 mark, and the rest by the 2 minute mark. If you’re not using a timer, just pour gradually enough that the water has time to pass through without overflowing the top of your grounds..
As we said in the introduction, this method is highly forgiving. The most important part is that “bloom” step. Make sure you give those grounds a little time after that first pour and enjoy!